Previous article We built the Umami analysis platform service and initially avoided the problems caused by token leakage.
But at the end of the article we raised a question:
You can only log in to view statistics in the intranet environment
So in this article, we will use Cloudflare Worker to encapsulate our /api/websites/xxx/stats request to completely solve this problem.
Creating a Cloudflare Worker
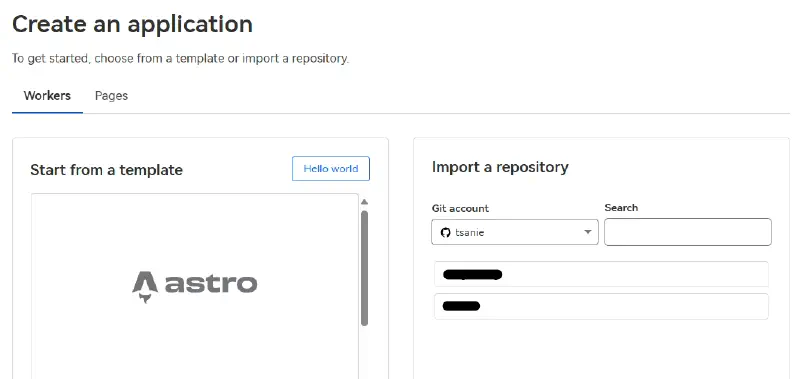
First, log in to theCloudflare Dashboard, select Compute (Workers) on the left, and click Create on the Workers & Pages page that pops up.
Since our worker is relatively simple, we directly select Hello world, fill in a random name (for example, my-umami-stats), and click Deploy to publish it.
Click the Edit code button in the upper right corner of the worker homepage to edit the code and fill in the following code:
 1
 2
 3
 4
 5
 6
 7
 8
 9
10
11
12
13
14
15
16
17
18
19
20
21
22
23
24
25
26
27
28
29
30
31
32
33
34
35
36
37
38
39
40
41
42
43
44
45
46
47
48
49
50
51
52
53
54
55
56
57
58
59
60
61
62
63
64
65
66
67
68
69
70
71
72
|
const UmamiUrl = 'https://u.example.com';   // Replace this with your umami service address
const AllowOrigins = ['https://example.com', 'https://www.example.com'];  // Here is a list of domain names that are allowed to cross domains

async function createResponse(response, mimeType, origin) {
  const data = await response.text();
  let corsHeader;
  if (origin) {
    if (AllowOrigins.indexOf(origin) < 0) {
      origin = '';
    }
    corsHeader = {
      'access-control-allow-origin': origin,
      'access-control-allow-methods': 'GET,HEAD,POST,OPTIONS',
      // 'access-control-max-age': '86400',
      'access-control-allow-headers': 'content-type'
    };
  }
  response = new Response(data, {
    headers: {
      ...response.headers,
      'content-type': mimeType,
      ...corsHeader
    }
  });
  return response;
}

async function getScript(request) {
  let response = await caches.default.match(request);
  if (!response) {
    response = await fetch(`${UmamiUrl}/script.js`, request);
    response = await createResponse(response, 'application/javascript');
    response.headers.append('cache-control', 'public, max-age=86400');

    await caches.default.put(request, response.clone());
  }
  return response;
}

async function sendApi(request, url, bearer) {
  request = new Request(request);
  // request.headers.delete('cookie');
  if (bearer) {
    /* Note that this is replaced with your login token, which can be obtained via POST /api/auth
     * {
     *   "username": "<user name>",
     *   "password": "<password>"
     * }
     */
    request.headers.append('authorization', 'Bearer xxxyyyzzz');
  }
  let response = await fetch(`${UmamiUrl}${url}`, request);
  response = await createResponse(response, 'application/json', request.headers.get('origin'));
  return response;
}

export default {
  async fetch(request) {
    const url = new URL(request.url);
    const pathname = url.pathname;
    switch (pathname) {
      case '/script.js': return await getScript(request);
      // `/api/send` request is used to submit access information, no token is required
      case '/api/send': return await sendApi(request, '/api/send');
    }
    // `/api/websites/xxx/stats` is used to obtain site statistics, and a token is required
    if (/^\/api\/websites\/[0-9a-f-]+\/stats$/.test(pathname)) {
      return await sendApi(request, `${pathname}${url.search}`, true);
    }
    return new Response(null, { status: 404 });
  },
};
|
When finished, click Deploy in the upper right corner to publish this version.
Creating a Worker Route
This way, we can get our site statistics without a token through an address like https://my-umami-stats.example.workers.dev/.
If you want to access this worker through your own domain name, we also need to add a Worker route in the custom domain name.
Go to your domain name management homepage, select Workers Routes in the left menu, click the Add route button on the right, write u.example.com/* in the route (note to replace it with your own domain name), and select the my-umami-stats you just created in Worker.
You also need to add a resolution record for u.example.com in DNS. The value is not important, but make sure to check Proxied (I set it to CNAME to my-umami-stats.example.workers.dev).
You are done. You can visit https://u.example.com/script.js to check whether the proxy has been successfully established.